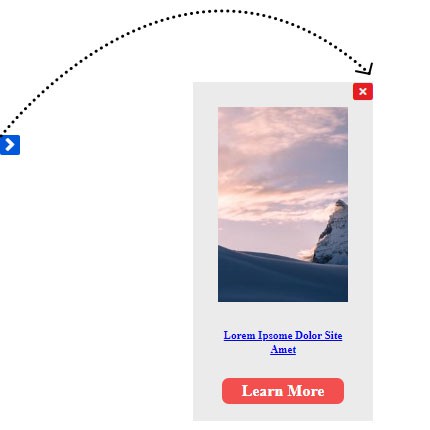
Jquery toggle form using if else statement
In this tutorial, we created a custom jQuery toggle form using the if else statement it’s awesome jQuery toggle functionality
This tutorial is very helpful if you want to add an image, HTML form, and button and you want to show any product then it’s very helpful.
In this article, we will create a toggle form in the below simple steps
- Step 01: Create HTML toggle div
- Step 02: we will write some custom CSS
- Step 03: we create jquery functionality
It is onload slide form.

Step 01: Create HTML toggle div
First of all, I create an HTML structure. it's a very simple way. be sure to include font awesome and jquery library
        <link rel="stylesheet" href="https://cdnjs.cloudflare.com/ajax/libs/font-awesome/6.2.1/css/all.min.css" />
<script src="https://code.jquery.com/jquery-3.6.1.min.js"></script>

<div class="wrapper_new">
    <div class="box_wrap">
        <div id="slide">
            <a href="https://bootstrapfriendly.com/"><img src="https://picsum.photos/seed/picsum/200/300" /></a>
            <span id="flash_poup_open_close">
                <i class="fa fa-window-close" aria-hidden="true"></i>
            </span>

            <h5><a href="img/azadi-ka-book.jpg">Lorem Ipsome Dolor Site Amet</a></h5>
            <div class="btn_ankr">
            <a href="https://bootstrapfriendly.com/">Learn More</a>
            </div>
        </div>
    </div>
</div>
Step 02: we will write some custom CSS
Its Ossam Custom style CSS In this article we will create a CSS keyframe
        /* slide */
.wrapper_new {
    position: fixed;
    bottom: 0;
    overflow: hidden;
    width: 180px;
    height: auto;
	z-index: 9999;
}

.wrapper_new .box_wrap #slide {
    position: relative;
    left: -600px;
    height: auto;
    background: #ebebeb;
    -webkit-animation: slide 0.5s forwards;
    -webkit-animation-delay: 2s;
    animation: slide 0.5s forwards;
    animation-delay: 2s;
    z-index: 999;
    padding: 25px;
}

.wrapper_new.intro-new {
    position: fixed;
    left: -160px;
    bottom: 0;
    transition: all ease-in 0.9s;
}
div#slide i.fas.fa-angle-right {
    background-color: #0058d9;
    padding: 0 5px;
    border-radius: 2px;
    color: #fff;
}
.wrapper_new.intro-new div#slide {
    background: transparent;
}

@-webkit-keyframes slide {
    100% { left: 0; }
}

@keyframes slide {
    100% { left: 0; }
}
/*
#flash_poup_open_close i{

} */
.box_wrap #flash_poup_open_close i {
    position: absolute;
    right: 0;
    z-index: 1111;
    font-size: 20px;
    top: 0;
	cursor: pointer;
	color: #e31e24;
}
div#slide img {
    width: 100%;
}
.btn_ankr a {
    background-color: #f34f4e;
    padding: 4px 20px;
    color: #fff;
    text-decoration: none;
    font-size: 16px;
    font-weight: 700;
    margin: 0 auto;
    display: table;
    margin-top: 15px;
    border-radius: 7px;

}
div#slide h5 a {
    display: block;
    font-size: 11px;
    line-height: 14px;
    margin-top: 12px;
	text-align:center;
}
Step 03: we create jquery functionality
we create a jquery if else statement.
        $(document).ready(function(){
    var open;
    $('#flash_poup_open_close').click(function(){
        //$('.wrapper_new').toggle("intro-new");
        // $('.wrapper_new').toggleClass("intro-new");
        // 	$(this).html('<i class="fas fa-angle-right"></i>');
        // });


        if(open){
            $('.wrapper_new').removeClass("intro-new");
            $("#flash_poup_open_close").html('<i class="fa fa-window-close" aria-hidden="true"></i>');
            //console.log('oepn');
             open = false;
        }else{
            $('.wrapper_new').addClass("intro-new");
            $("#flash_poup_open_close").html('<i class="fas fa-angle-right"></i>');
            //console.log('close');
             open = true;
        }

    });
});
